Beginner’s Guide to Using 3D Nail Art Decorations at Home.Learn how to do a 3D nails art at home with this simple and super fun guidance.A step by step tutorial which will help you to make your nails shine at home and there is no need of going to any salon and wasting your time.
Also Read: What are the Benefits of Using Cuticle Oil on a Regular Basis?

Turn Your Nails from Plain to gorgeous With The Best Technique
Are you bored of seeing you plain regular nails? Do you want to make you regular plain nails into a gorgeous one? Than you at the right place. This guide will help you to transform your basic nail into 3 D ones. Not to be worry about anything as you only need is Right tool kit, A right colour and this page which is beginner friendly.So their is no need of going to expensive salons and wasting your time.
Why to do 3D Nail Art?
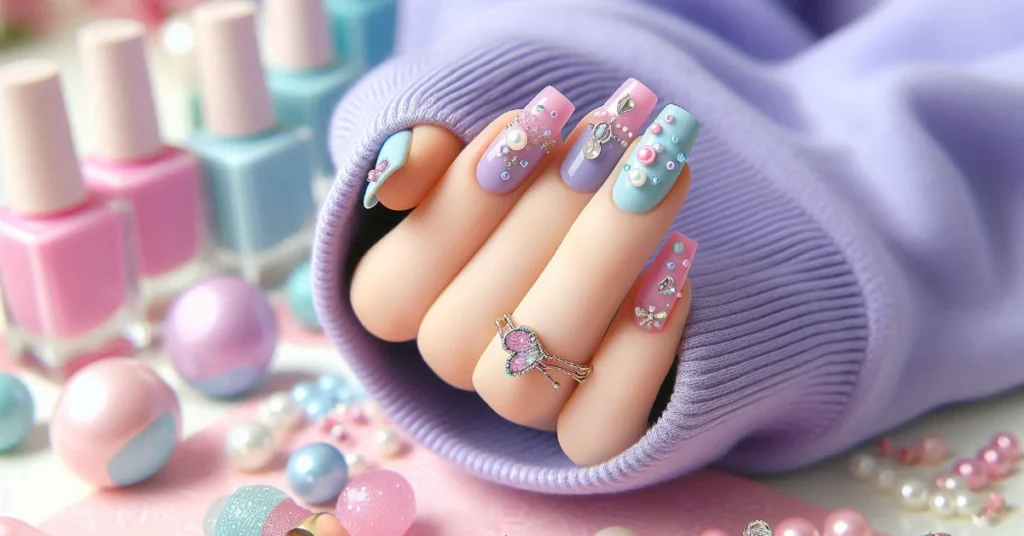
3 D nail art is just sticking 3 D items on your nails.Rather then a plain nail paint you can add different little charms, 3 D hearts and sculpted thing on your nails. It will make your nails looks so cool and stand out on a party. 3 D nails make you personality more visible as they are so cool to watch.
The Starter Kit For 3D Nails
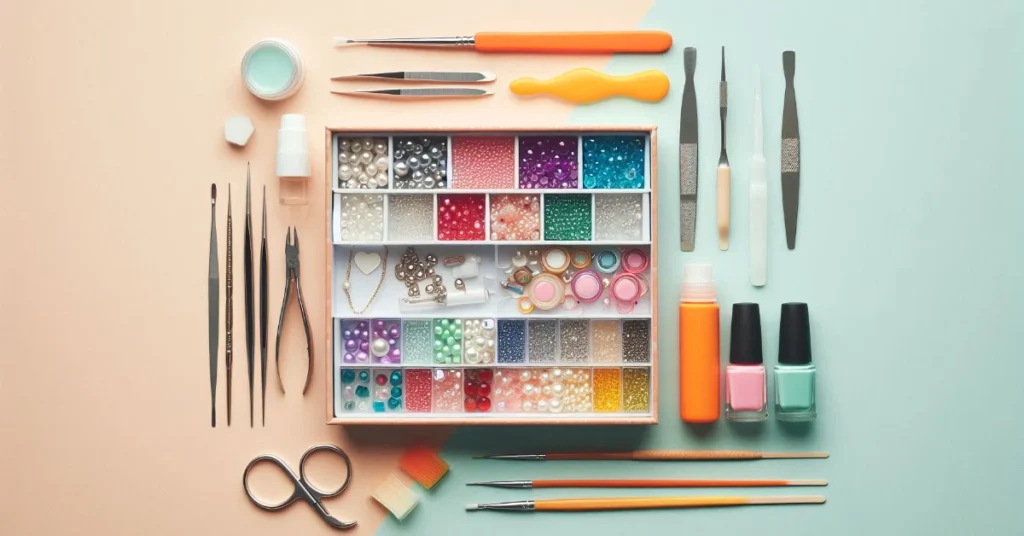
Before you jump in, here’s what you’ll need to get started:
- 3D Nail Decorations: Grab a variety pack with things like rhinestones, pearls, studs, or small charms. Pick styles that match your mood sparkly, cute, or bold!
- Tweezers or Wax Stick: Tweezers help you place tiny items carefully. A wax stick has a sticky end that grabs small pieces easily.
- Nail Glue: Use glue made just for nails so your decorations stay on safely and don’t damage your nails.
- Top Coat : A lso known as clear nail polish this goes on last to lock in your decorations and keep them from falling off.
- Lint-Free Wipes & Nail Polish Remover: These help clean up any mess around the nails.
- Base Coat and Nail Polish: Use a base coat to protect your nails, then pick your favorite color polish as the background.
- Cuticle Pusher or Orange Stick: Helps with placing decorations and fixing any tiny mistakes.

How to do 3D Nail Art at Home?
Let’s go through the steps to make your nails look fabulous!
1. Get Ready Your Nails
First of all clean you nail and dry them properly. Than cut them in a good shape and push your cuticles back for more space for the decoration. Than add the base coat and give it some time to dry.
2. Apply Nil Paint On your nails
Now apply one or two coats of any nail paint which is your favourite and then let it to dry for sometime. This nail paint colour is the background of your nail so choose it wisely it should match the decoration.
3. Plan Your Look
Before adding glue thin first about where you ant your decoration?Do you want it on all of your nails or some of them. The very helpful tip is to draw your design on the paper and add decoration without glue it will make you clear about your design weather to apply it on nails or not.
4. Use Nail Glue
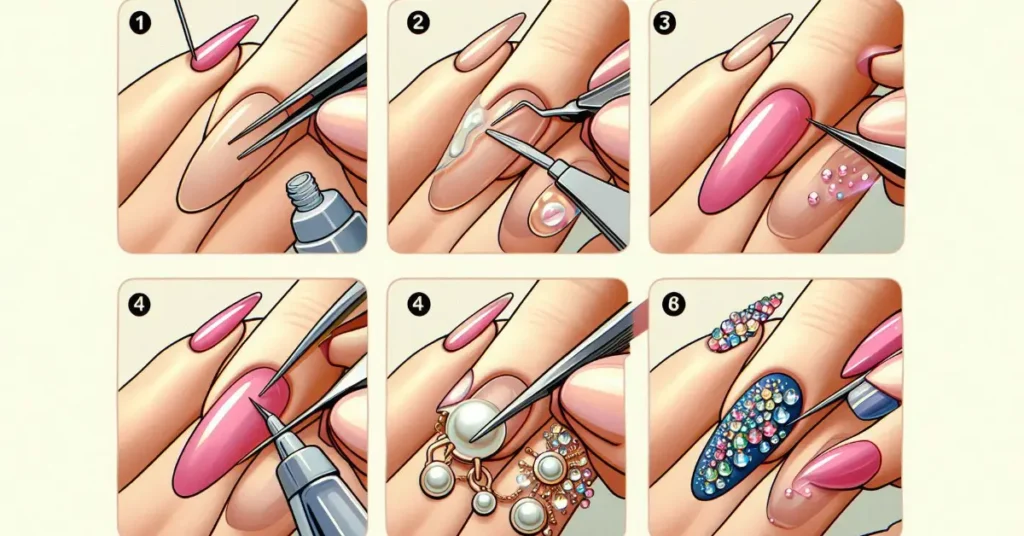
Once your polish is dry, add a small drop of nail glue where you want the decoration. Only work on one nail at a time so the glue doesn’t dry too fast.
5. Pick Up a Decoration
Use wax stick or tweezers for picking the decoration.Be gentle while picking the decoration especially for the little ones.
6. Place It Carefully
Stick the decoration right on the glue spot. Adjust it if needed, but don’t press too hard at first. You want the glue to spread a little and hold the piece in place.
7. Press and Secure
If it’s a big or bumpy decoration, gently press the edges with your orange stick to make sure it sticks well. Hold it in place for a few seconds.
8. Repeat for Other Nails
Repeat the glue-and-place steps for any other nails you want to decorate. Take your time and enjoy the process!
9. Seal the Deal with Top Coat
After all your pieces are in place and the glue is dry, apply a thick layer of clear top coat. This locks everything in and gives your nails a smooth, shiny finish. You can even add a second coat for extra strength.
10. Let It Dry All the Way
Wait patiently for your nails to dry completely. Try not to touch anything while they set, or your hard work might get messed up. You can use a quick-dry spray or fan to speed things up.

Extra Tips for Nail Art
- Start Small: Try simple designs with just one or two gems if you’re new to this.
- Don’t Overdo It: You don’t have to cover every nail. One or two accent nails can still look super stylish.
- Avoid Glue Messes: Use just enough glue to stick the piece. Too much can ooze out and make things look messy.
- Top Coat Is Your Best Friend: as it will keep everything in place and make you nails look shiny and glossy.
- Try New Themes: Match your nails to the season, holidays, or your mood. There’s no limit to what you can create!
- Pick the Right Size:Big charms do fit on small nail so you have to choose the decoration that is perfect fit according to your nail size and length.
- Practice Makes Perfect: If it doesn’t turn out perfect the first time, that’s okay! Keep trying and you’ll get better.
- Removing Decorations: To remove the decoration soak you and in nail paint remover with Aceton. Be patient and let the glue soften then lift the decoration gently with the stick and avoid hard picking otherwise it will damage you nail.
Show Your Style With 3 D Nails
The best part of 3 D nail art? You shows the world who you are? weather you like the shiny and glittery nail,flower nails,animals nails or the funky one these nails will reflect your personality and also looks so cool.you can wear them if going to the glam party or want some fun at home.
Steps for 3 D Nail Art
| Step | What to Do | Why It’s Important |
|---|---|---|
| 1 | Clean and prepare your nails | Makes a good base for polish for best results |
| 2 | Paint your nails with your favourite colour | Adds the background for your design must match with decoration |
| 3 | Plan your design on a paper | Helps you avoid mistakes and messy glue and fatique |
| 4 | Add nail glue where you want to add charm | Holds your decorations in place for a longer time |
| 5 | Pick and place decorations carefully | The fun part make your nails look awesome and pretty |
| 6 | Press and secure big pieces on your nail | Keeps larger decorations from falling off |
| 7 | Repeat for other nails same as before | Finish your full design, one nail at a time |
| 8 | Apply top coat at the end | Seals in your design and adds shine |
| 9 | Let nails dry for sometime | Stops smudges and helps your look last longer |
Key Points
- 3D nail art adds texture and creativity to your nails.
- It’s great for expressing who you are and standing out.
- You need the right tools: decorations, nail glue, tweezers, top coat, base coat, and nail polish.
- Always prepare your nails by cleaning, cutting, and applying a base coat.
- Choose a base colour that goes well with your 3D decorations and charms.
- Plan your design on a paper before applying glue to avoid mistakes and mess.
- Use nail glue carefully a small amount is enough otherwise it will create a mes.
- Place decorations with tweezers or a wax tool for precision.
- Seal with a thick top coat to keep everything in place and make it shine
- Let your nails dry completely for sometime to avoid smudging.
- Start with simple designs if you’re a beginner and do not know anything about 3 D nails.
- Accent nails (1 or 2 per hand) are a great way to start make sure not to overdo it.
- Match decoration size with your nail shape and length otherwise it will not stay in place and look ugly.
- Be patient and practice you’ll get better with time.
- To remove, soak nails in acetone and gently lift decorations with any stick and avoid being hard.
- Your nails are a canvas for self-expression have fun with it!
FAQs
What is 3D nail art?
3D nail art is fun way to decorate your nails with 3D item like charms, shells,hearts or shiny things which will make it look cool and give a raised effect.
Can I really do 3D nail art at home?
Yes! With the right tools, patience, and a little practice, you can create amazing 3D nail looks right from home no need to go to expensive salon.
Is 3D nail art safe for my nails?
Yes, it’s safe as long as you use proper nail glue (not craft glue only use nail glue), don’t pull off decorations, and follow good removal methods(soak in nail paint remover with acetone until glue soften). Always be gentle with your natural nails.
How do I make my 3D decorations stay on longer?
Make sure your nails are clean and dry, use enough glue, and seal everything with a thick top coat. Let your nails dry fully before using your hands too much.
Do I have to use 3D art on every nail?
Nope! Many people decorate just one or two “accent nails” on each hand. it looks stylish, decent and easier. Good choice for beginners.
Also Read: What are the Benefits of Using Cuticle Oil on a Regular Basis?
Conclusion
Congratulations you’ve just unlocked the world of 3 D nail art!Now you are able to make your nails looks wow at home and you don’t need to go to any salon.Just you need is little patience, Practice and right tools.And then you will be pro in making 3 D nails at home own you own.
Don’t be afraid and make a start from the small and easy ones. As you practice more and more by one and two decoration on one hand it will helps you to become a pro. Whether you love sparkly rhinestones, cute charms, or tiny pearls, the sky’s the limit when it comes to expressing yourself through your nails design.
Most of all have fun! Nail art is all about being confident and creative. So grab your decorations, turn on your favorite playlist, and let your inner nail artist shine. Your next favorite manicure is just a brush and a gem away!